
Machine Vision Inspection Optics

Machine Vision Lenses for Quality Inspection: How to Choose Optics by Task

Machine vision lens selection for label, seal, liquid level, and print inspection, matched to defect size, resolution, working distance, and depth of field.

By the Commonlands engineering team · Updated July 2026 · 23 min read

An overhead camera with a C-mount lens and ring light inspecting parts on a conveyor

The lens determines whether a quality inspection system can see the defects that matter. Start with the defect, not the camera: minimum feature size sets required resolution, working distance sets focal length, and surface geometry (flat versus curved or uneven) decides whether you need a fixed-aperture M12 lens or a C-mount lens with adjustable iris.

Label, seal, liquid level, and print inspection each impose different constraints: glare and curved-surface DOF for labels, contrast and presentation variability for seals, backlighting and calibration for fill level, and registration-grade distortion for print. This guide works through the shared specification order once, then treats each application on its own terms.

Start with the defect: what are you trying to see?

Every inspection lens specification starts with the defect, not the focal length and not the sensor. Surface scratches and cracks need strong MTF at fine spatial frequencies. Dimensional go/no-go measurement needs low distortion, because geometric error in the lens becomes measurement error directly. Color and texture defects depend more on spectral response and illumination uniformity than resolution. Label and print verification need enough resolution across the full field, low distortion, and enough depth of field to handle curl, curvature, or uneven surfaces.

The output of this step is one number: minimum detectable feature size. A 50 µm scratch on a painted surface and a 500 µm dimensional deviation on a machined part drive completely different specifications downstream. When the defect type is unclear, design to the smallest feature you expect to care about. You can open the aperture or reduce magnification later, but you cannot recover detail that was never captured.

This hub covers four inspection applications that recur across packaging and manufacturing lines: label inspection, seal inspection, liquid level and fill inspection, and print inspection. Each section below names the sub-tasks within that application and the specific optical constraint that dominates, because "pick a lens for label inspection" is not a single specification any more than "pick a lens for quality inspection" is. For inspection tasks that fall outside these four categories (electronics and semiconductor inspection, or food, beverage, and pharmaceutical packaging), see the related sub-pillars on electronics inspection and food and beverage inspection.

A machine vision camera and ring light reading a printed label on a package
A ring light around the lens flattens shadows for print reading.

Calculate the required resolution

Once you have a minimum feature size, calculate sensor resolution: 3 to 5 pixels per smallest feature. Three pixels gives marginal detection; five gives reliable detection with enough signal margin for thresholding algorithms. Use five unless you have a specific reason not to.

A worked example

Inspecting a 100mm part, detecting defects down to 50 µm, at 5 pixels per defect: 5 ÷ 0.05mm = 100 pixels per millimeter. Across a 100mm field, that is 100 px/mm × 100mm = 10,000 pixels needed along the critical axis: a 100-megapixel sensor at 1:1 aspect, or roughly 56 megapixels (10,000 × 5,625) if the part is oriented along the long axis of a 16:9 sensor. Orientation cannot substitute for the pixel count the critical axis requires. It only changes which axis carries the requirement, and putting it on the short axis of a 16:9 sensor makes the total resolution worse, not better. Some applications accept 3 pixels per defect to control sensor cost, trading detection margin for price: 3 ÷ 0.05 = 60 px/mm × 100mm = 6,000 pixels needed along the critical axis. A 12MP 1.1" sensor (4096 × 3000) falls short at only 4096 pixels on its longest axis: roughly 41 px/mm across the 100mm field, or about 2 pixels per 50 µm defect. Reaching 6,000 pixels along the critical axis needs a sensor in the 28MP class (for example 6144 × 4620), a smaller field of view, or multiple cameras.

Technical note

Lens resolution must meet or exceed the sensor's pixel pitch. A 12MP sensor at 1.1" has 3.45 µm pixels; a lens rated for 12MP resolves at that pitch. Pairing a lower-rated lens with a higher-resolution sensor means the optical blur, not the sensor, sets your effective resolution: you are paying for pixels you cannot use.

For the full relationship between feature size and pixel count, see minimum detectable size in machine vision and the broader spatial resolution guide.

Resolution requirements differ by inspection type covered in this hub. Barcode and 2D-code decode is comparatively forgiving: their structured, redundant geometry (plus the error correction built into Data Matrix and QR) tolerates a few marginal pixels better than free-form OCR; OCR and lot code reading is tighter because arbitrary character strokes need to be individually resolved, not matched against a known structure. Seal-width and print-registration measurement need enough pixel density that quantization error itself does not dominate the measurement tolerance. If the tolerance is 0.5mm and your pixel pitch on the object plane is 0.2mm/px, you have roughly 2.5 pixels of margin, which is thin. Fill-level measurement has the same concern in the vertical axis: pixel density sets a floor on fill-height resolution independent of distortion, so a sensor with 1,000 rows covering a 100mm container gives 10 pixels per millimeter, adequate for a 1mm increment but not for 0.25mm.

Set the working distance first, then compute the focal length

Working distance is a design consideration set early by conveyor height, robot reach, enclosure dimensions, and part-loading clearance, not a free variable to pick after browsing a lens catalog. Once mechanical design is committed it becomes effectively fixed. Once you have working distance and required field of view, focal length follows exactly for rectilinear projection:

EFL = (WD × sensor_width) / FOV_width WD = working distance, sensor_width = sensor dimension across the FOV axis, FOV_width = required field of view

At a 300mm working distance, a required 100mm field of view, and a 14.1mm sensor width (1.1" sensor, 4096 × 3.45 µm pixels): EFL = 300 × 14.1 / 100 = 42.3mm, pointing to a 50mm lens. At 500mm working distance with the same FOV: EFL = 500 × 14.1 / 100 = 70.6mm, pointing to a 75mm lens. Verify your own numbers with the field of view calculator or the EFL calculator before ordering.

The focal length selection guide covers additional worked examples.

This same equation, applied with each application's own working distance, field width, and an assumed 1/1.8" (7.2mm-wide) sensor, is what produces the specific focal-length numbers referenced later in this hub: roughly 18-23mm for a label station at 250-300mm working distance and an 80-120mm inspection zone, roughly 21mm for a typical seal-inspection zone at 200mm, and roughly 14mm for a fill-level station framing a 150mm container from 300mm. Recompute with your own sensor width; these shorthand numbers do not hold for a 1.1" sensor, for example. Working distance also drives a mechanical decision that is easy to overlook: C-mount lenses refocus by moving internal groups on a cam, which rebalances aberrations across a limited travel range and stops hard at the mechanical end of that cam. M12 lenses focus by threading the entire barrel in and out of the holder: there is no internal group movement to rebalance aberrations, so off-axis aberrations (field curvature and astigmatism) at short working distances are a design limit rather than a cam-travel limit. Neither system is a variation of the other; treat working-distance tolerance and refocus behavior as a property of the mount type you have chosen, not an assumption you can carry over between them.

Choose the right aperture

Aperture trades depth of field against diffraction. Opening the aperture reduces depth of field but avoids diffraction softening; stopping down increases depth of field but softens the image once you go too far. For flat parts at a fixed working distance, open the aperture for maximum light throughput and resolution, typically F/2.8 to F/5.6 on many C-mount industrial lenses, MTF permitting. For 3D parts or components with height variation, stop down using the depth of field calculator to find the aperture that covers your height range.

Diffraction sets a practical ceiling on how far you can stop down: above F# ≈ 2 × pixel_pitch_µm, diffraction softening typically exceeds the DOF/resolution gain from stopping down further. For a sensor with 3.45 µm pixels, that ceiling is roughly F/7; for 25MP sensors with 2.74 µm pixels, it is closer to F/5.5. See the f-number guide for the full aperture, depth of field, and diffraction tradeoff.

Aperture and illumination are coupled at the system level, and this matters across all four applications in this hub. A faster lens (lower F-number) collects more light per unit time, letting you run lower illumination intensity or shorter exposure for the same signal. Stopping down for depth of field costs light, and you compensate with brighter illumination rather than accepting a dimmer, noisier image. In machine vision this tradeoff is usually easy to make because illumination is programmable: strobed LEDs or ring lights driven at higher current recover the exposure lost to a smaller aperture. A two-stop aperture reduction typically calls for roughly four times the illumination power to hold exposure constant. M12 lenses typically ship with a fixed aperture, which removes this lever entirely: once the lens ships at F/2.8 or F/3.4, depth of field at that station is whatever that aperture gives you, and the only remaining variables are working distance and illumination geometry.

What machine vision lens should I use for label inspection?

Label inspection is a high-resolution, glare-control problem on curved or reflective surfaces, and it is at least four distinct optical tasks: barcode and Data Matrix reading, OCR and lot code reading, label placement verification, and print-defect inspection. Each has different tolerances on distortion, resolution, and depth of field. Specify by task, not by a generic "label inspection" category.

Barcode and Data Matrix decoders read bar-to-space ratios and 2D cell geometry, so distortion that compresses modules near the image periphery degrades decode confidence before any resolution problem appears; target 5 or more pixels across the narrowest element. OCR and lot code reading is less structured: the algorithm distinguishes character strokes without knowing the character in advance, so it needs tighter contrast uniformity and resolution per stroke, and a lens that bows lines near the edge misreads characters at the corners. Label placement verification needs enough field coverage to see the label boundary and substrate together and tolerates more distortion than decode tasks. Print-defect and legibility inspection is primarily contrast and spatial frequency: resolving voids, streaks, or faded ink depends on defect size, and illumination design drives most of the outcome.

On curved containers, bottles, and formed packages, the label surface is not a flat plane at the camera distance: height excursion of several millimeters across the label puts real pressure on depth of field. An adjustable iris lets you stop down and recover exposure through illumination power, a routine tradeoff since label inspection illumination is usually programmable. M12 lenses typically ship with a fixed aperture, which removes that lever and is fine for a flat label but becomes a real constraint during commissioning on a curved surface.

Distortion rule of thumb

Distortion tends to matter most for codes or text near the outer edge of the field, where radial distortion is largest; a lens with less than 0.3% TV distortion generally removes it from the variable list. See what is a low distortion lens for how TV distortion and rectilinear distortion specs relate.

The CIL052 5.2mm M12 lens at F/3.4 and -0.1% distortion suits compact, geometry-sensitive reads on flat labels up to a 1/1.8" sensor. The CIL522 12mm C-mount with F/1.4-F/16 adjustable iris and 0.4% distortion is the general choice when labels sit on curved containers. Telecentric optics are rarely the right answer for label inspection: barcode decoding, OCR, and placement checks are pass/fail or decode tasks, not dimensional metrology requiring apparent-size invariance across working distance. Commonlands does not currently sell telecentric lenses. For label registration measured to micron tolerances, that is a specialist-vendor problem, not an ordinary label station.

What machine vision lens should I use for seal inspection?

Seal inspection is a contrast and presentation problem first, and it splits into four tasks that do not share one lens specification. Contamination detection inside the seal lane looks for product residue or particulates trapped in the joint: the optical signal is contrast between contaminant and seal material, and lighting geometry usually does more work than lens choice, though the lens needs enough spatial resolution and depth of field to hold focus on the seal surface. Seal-width verification is where distortion matters directly: barrel distortion makes an identical seal look narrower at the image edges than at center, so a single pass/fail width threshold only holds reliably at sub-0.5% distortion. Seal-position and continuity checks need field coverage to see the seal and package edge together, plus resolution along the seal length to catch gaps. Package-presence and gross-defect checks are the least demanding: wide field of view and basic contrast are usually enough.

Packaging presentation is rarely flat. Flexible pouches swell after filling, blister packs raise cavities near the seal, and sachets sag between conveyor guides. Even a few millimeters of height variation across the inspection zone can pressure depth of field at wide apertures. Stopping down the iris is the direct fix, and because seal-inspection illumination is typically programmable (strobe timing, LED power), compensating for the light lost by stopping down is a routine, reversible tradeoff. M12 lenses typically ship with a fixed aperture, which removes that option and is fine for rigid-tray or vacuum-formed flat presentations but becomes a real limit on flexible formats.

Practical target

0.5% distortion or less covers most seal-width and seal-position tasks reliably. Confirm the lens manufacturer publishes MTF data at the sensor corner, not just the center. Low distortion is not the same guarantee as sharp edges, since field curvature and astigmatism can still degrade corner sharpness independently.

The CIL522 12mm C-mount (F/1.4-F/16, 0.4% distortion) handles general seal inspection where depth of field is the primary pressure; the CIL544 25mm C-mount (17.6mm image circle, 20MP+) suits high-resolution contamination detection or wider seal areas. The CIL052 5.2mm M12 at -0.1% rectilinear distortion fits narrow pouch seals and small-format sachets where the head must stay compact and presentation is consistent. Telecentric optics are rarely necessary here: most seal checks are pass/fail or go/no-go on a minimum width, not sub-pixel dimensional metrology.

What machine vision lens should I use for liquid level inspection?

Liquid level and fill inspection depends on transparent-container backlighting more than on lens choice. Diffused backlighting creates a high-contrast silhouette of the container and liquid column, so the meniscus reads as a sharp horizontal edge for most liquids, including dark and opaque ones. Without it, detection depends on reflective contrast that varies with liquid color, container material, and ambient light. Repeatable container positioning matters just as much: if the container shifts laterally between frames, the meniscus's apparent pixel position changes even though the actual fill level has not, and no lens can compensate for that mechanical problem.

The first optical decision is not M12 versus C-mount. It is whether the station passes/fails a threshold or measures fill height or volume. For threshold-based pass/fail checks (the meniscus above or below a fixed reference line), the comparison is binary and moderate distortion of 0.5% TV or less is usually sufficient, since the reference mark and meniscus sit in the same image and the error largely cancels. This is the regime where compact, low-cost M12 lenses are the practical default: the CIL083 8mm M12 at $19, F/2.8, and -0.5% TV distortion covers 1/1.8" sensors and keeps cost per lane low on 4-, 6-, or 8-lane systems, where an $800 difference across eight lanes is a real line item.

For measurement-grade fill estimation, where a specific pixel row maps to a specific physical fill height, distortion error becomes a systematic bias rather than noise that averages out. Since distortion displacement scales with radial distance from center, a 0.5% distortion lens introduces roughly 0.5mm of apparent position error at the edge of a 200mm field height (100mm from center). Target under 0.2% distortion. The CIL533 16mm C-mount at -0.1% distortion or the CIL553 16mm C-mount at -0.09% distortion are the appropriate starting points, and C-mount's larger sensor options add pixel density per fill increment that fixed M12 image circles cannot match.

Where standard optics stop being enough

360-degree bottle inspection in a single pass needs multiple synchronized cameras or a pericentric lens. Rotating-vial systems, ultra-high-speed fill verification, and continuous-web line-scan inspection are separate system architectures. Commonlands does not currently sell pericentric lenses, liquid-lens autofocus modules, or line-scan optics; these require a specialist vendor, not a fixed-station area-scan lens choice.

What machine vision lens should I use for print inspection?

Print inspection is a registration and fine-feature contrast problem, and like label and seal inspection it splits into tasks with different requirements. Date and lot code reading is the least demanding: fixed-format decoders already know the character set, tolerating more optical imperfection, though small characters or low-contrast ink still need adequate resolution and consistent geometry. OCR and character verification is tighter: the algorithm must distinguish stroke geometry without prior knowledge of the character, so contrast uniformity and resolution per stroke matter more, and distortion that bends a straight baseline into an arc near the image edge increases misread risk.

Print-position and registration checks are the strictest distortion case in this entire hub. A registration mark's apparent position is compared to a reference position, and distortion displacement scales with radial distance from the field center, not with total field width. On a 200mm-wide inspection zone, the edge sits 100mm from center, so a lens with 2% barrel distortion produces roughly 2mm of apparent position error there (closer to 2.5mm at the true corner of a 4:3 field). Against registration tolerances that are often ±0.5mm or tighter, that error does not just fail the check; it makes the measurement meaningless. Low distortion is a prerequisite here, not an optimization. Print-defect detection (voids, streaks, missing inkjet dots, faded thermal-transfer characters) is the least distortion-sensitive of the four: it is primarily a spatial-resolution and contrast-uniformity problem, and illumination geometry drives most of the outcome.

Registration distortion budget

Distortion tends to matter most for print near the outer edge of the field, where radial distortion is largest; a lens with less than 0.3% distortion generally removes it from the variable list for registration and OCR work.

C-mount is the practical default for most fixed-station print inspection, not because M12 is inadequate but because an adjustable iris, larger sensor coverage, and higher-resolution optical designs give more tuning margin where print quality is tightly specified. The CIL522 12mm C-mount (F/1.4-F/16, 0.4% distortion, 11.4mm image circle) covers general fixed-station work; the CIL544 25mm C-mount (17.6mm image circle, 20MP+, 130mm to infinity) handles high-resolution print-defect and small-character inspection at longer standoff. The CIL052 5.2mm M12 at -0.1% distortion suits flat-surface, tight-envelope date code and OCR heads.

Continuous-web print inspection (film, paper, foil, or label stock running at meters per second) is a different engineering problem that uses line-scan cameras and linear-sensor optics; Commonlands does not currently sell line-scan or continuous-web optics. A useful boundary test: if the product is stationary or slowed to a controlled stop for the inspection exposure, area-scan lenses in this guide apply. If the inspection must capture every millimeter of a moving web at line speed without stopping, that is a line-scan application requiring a specialist vendor.

Distortion matters for measurement more than for pass/fail checks

Lens distortion is the deviation between where a point appears in the image and where it would appear under perfect rectilinear projection. For pass/fail defect detection (scratches, contamination, missing features), moderate distortion is acceptable. For dimensional measurement, it is not.

A practical threshold for precision measurement without software correction is roughly 0.5%. Distortion displacement is radial: it scales with a point's distance from the field center, not with total field width. At 0.5% distortion on a 100mm field, a point at the field edge (50mm from center) can be displaced by roughly 0.25mm from its true position: noise against a ±1mm tolerance, a dominant error source against ±0.1mm. Software distortion correction exists and is widely used, but it adds latency, requires accurate calibration, and degrades gracefully rather than absolutely when that calibration drifts. Relying on it to compensate for a high-distortion lens in a tight-tolerance application is not a substitute for specifying the right lens.

If your application involves dimensional measurement

Specify distortion tolerance before selecting a lens, not after. Most vendor datasheets quote distortion as a single number at a reference field. Verify it covers your actual measurement region, not just the center of field.

The distortion budget differs meaningfully across the four applications in this hub. Print registration is the tightest, because a 2% distortion figure on a 200mm inspection zone can produce roughly 2mm of apparent position error at the edge (radial distance 100mm from center), against registration tolerances that are often ±0.5mm. Seal-width and label-code geometry sit in the middle, where a sub-0.5% distortion spec is usually sufficient. Fill-level threshold checks are the most forgiving, because the reference mark and the meniscus sit in the same frame and a consistent distortion error affects both similarly, largely canceling in a pass/fail comparison. It only becomes a real constraint once the station moves to measurement-grade fill estimation. The low distortion lens guide covers specification and selection in detail, including the difference between TV distortion and rectilinear distortion conventions.

Match the sensor format to the lens

The lens image circle must fully cover your sensor diagonal. A lens rated for 2/3" has an image circle of roughly 11mm; a 1.1" sensor has a diagonal of roughly 17.6mm. Put a 2/3" lens on a 1.1" sensor and you get severe vignetting: dark corners, loss of usable field, and edge MTF that collapses before the sensor edge.

Common pairings for quality inspection: a 2/3" sensor with a 2/3" C-mount lens for entry-level inspection systems; a 1.1" sensor with a 1.1" C-mount lens for mid-range conveyor and PCB inspection; and a 1.2" sensor with a 1.2" C-mount lens for high-resolution surface inspection. Oversizing the image circle protects against vignetting from the lens itself (a 1.1" lens on a 2/3" sensor wastes image circle rather than shading the corners), though the cost difference rarely justifies it. Oversizing is not automatically safe on resolution: a lens rated for a coarser pixel pitch can under-resolve a smaller, finer-pitch sensor (a 1.1"-format 3.45 µm-class lens on a 2/3" sensor with 2.4 µm pixels becomes blur-limited), so confirm the lens resolution rating matches the sensor's actual pixel pitch.

Full format-matching rules and vignetting mechanics are covered in the sensor size and lens compatibility guide. For sensor-specific field-of-view numbers, verify with the field of view calculator rather than estimating from catalog image-circle specs alone.

Sensor choice also sets the cost-per-lane calculation that shows up repeatedly in multi-station quality inspection lines. A compact M12 lens is often a fraction of the cost of a comparable C-mount lens. On an eight-lane fill inspection system, the difference between a $19 M12 lens and a $119 C-mount lens is roughly $800 across the station, a real line item in a production engineering budget. That cost advantage only holds if the M12 lens's image circle actually covers the sensor with margin. Oversizing the lens is the safer direction; undersizing it produces vignetting that no amount of software correction recovers.

A decision table: lens direction by inspection task

These are starting points, not absolutes. A curved-surface label station that also reads a Data Matrix code needs both low distortion and an adjustable iris at once; several rows below can apply to the same physical station.

Inspection task Primary optical constraint Lens direction Key metric
Barcode / Data Matrix reading Low distortion, adequate pixels per module M12 (compact) or C-mount (iris needed) <0.3% distortion; ≥5 px per module
OCR / lot code reading Contrast uniformity, resolution per stroke M12 or C-mount; tighter resolution budget <0.5% distortion; ≥5 px per stroke
Seal-width verification Distortion consistency across the field C-mount or M12 low-distortion option ≤0.5% distortion
Contamination / continuity check Contrast, spatial resolution, lighting geometry C-mount with adjustable iris preferred Resolve smallest defect feature
Threshold fill pass/fail Contrast on meniscus edge, cost per lane Compact low-distortion M12 ≤0.5% TV distortion
Measurement-grade fill estimation Distortion as systematic position bias C-mount, <0.2% distortion ≤0.2% TV distortion
Print-position / registration Low distortion across full field C-mount for larger sensors <0.3% distortion
Curved or uneven surface (any task) Depth-of-field control over height variation C-mount with adjustable iris DOF > surface excursion

Top machine vision lenses for quality inspection

Commonlands covers six quality-inspection tasks with C-mount and M12 lenses priced from $19 to $349. The ranked table below pairs each task with a specific SKU, its mount, focal length, and published distortion figure, so an inspection station can be specified from a single row.

How we picked: each row starts from the optical constraint that governs the task, then names the lowest-cost Commonlands lens that meets it with sensor-format margin. Resolution and contrast govern defect and contamination work, low distortion governs measurement and registration, and depth-of-field control governs curved surfaces. Distortion values are the figures published on each product page; where a cell reads "not the deciding spec," the task is pass/fail and resolution or lighting sets the outcome. Confirm image-circle coverage against your sensor diagonal with the field of view calculator before ordering.

# Inspection task Lens 마운트 EFL 왜곡 Why this pick
1 Surface defect detection CIL512 C-마운트 12mm Not the deciding spec 12MP across a 1.1" sensor and a 17.6mm image circle give the wide-field resolution scratch and blemish scans need; pass/fail defect work tolerates moderate distortion.
2 Label inspection CIL522 C-마운트 12mm 0.4% F/1.4 to F/16 iris recovers depth of field on curved containers. The CIL052 5.2mm M12 at -0.1% is the flat-label, compact-head alternative.
3 Print and registration inspection CIL533 C-마운트 16mm -0.1% Low distortion holds registration-mark geometry across the field, where a 2% barrel figure would exceed ±0.5mm tolerances. F/2.0, 2/3" up to 12MP.
4 Seal and contamination inspection CIL544 C-마운트 25mm Not the deciding spec 20MP-plus resolution and a 17.6mm image circle cover contamination detection and wider seal lanes at longer standoff, with an adjustable iris for uneven packaging.
5 Liquid level and fill inspection CIL083 M12 8mm -0.5% TV At $19 it keeps cost per lane low on multi-lane threshold pass/fail fill checks up to a 1/1.8" sensor. Measurement-grade fill moves to CIL533 or CIL553.
6 Dimensional gauging and measurement CIL553 C-마운트 16mm -0.09% Lowest published distortion in this set with 25MP-class resolution, so geometric error stays under tight measurement tolerances.

Dimensional gauging at the tightest tolerances calls for a telecentric lens, which holds apparent object size constant across working distance. Telecentric optics are a third-party, metrology-only class, not a Commonlands product; the lenses above cover the pass/fail and low-distortion measurement tiers beneath true telecentric metrology.

Product detail for the lenses named above. Confirm sensor-format coverage before ordering. Image circle and distortion figures below are from current product pages.
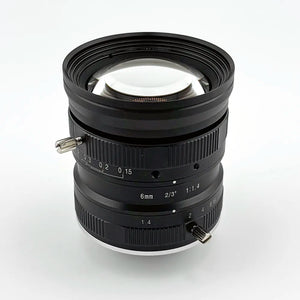
6mm 2/3인치 렌즈

CIL530-F1.8-CMANIR

6mm C-마운트 렌즈 2/3인치 5MP

$249.00

View details
8mm C 마운트 렌즈 Kowa Computar 2/3"

CIL531-F2.8-CMANIR

8mm C-Mount 렌즈 2/3" 12MP

$149.00

View details
12mm C 마운트 렌즈 Kowa Lucid Vision

CIL532-F2.0-CMANIR

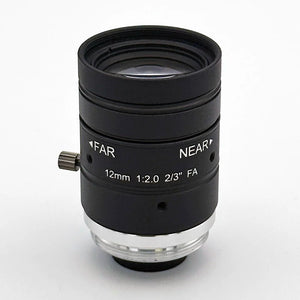
12mm C-Mount 렌즈 2/3" 12MP

$149.00

View details
16mm C-Mount 렌즈 Kowa Computar Lucid Vision Edmund Optics

CIL533-F2.0-CMANIR

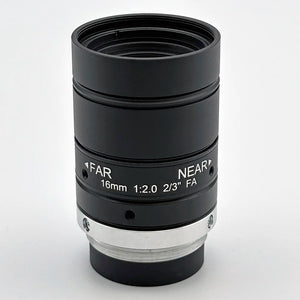
16mm C-Mount 렌즈 2/3" 12MP

$149.00

View details
25mm C 마운트 렌즈 Amazon

CIL534-F2.0-CMANIR

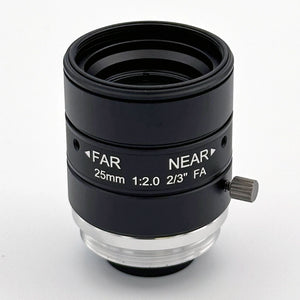
25mm C-Mount 렌즈 2/3" 12MP

$149.00

View details
35mm C-마운트 렌즈 Computar

CIL535-F2.0-CMANIR

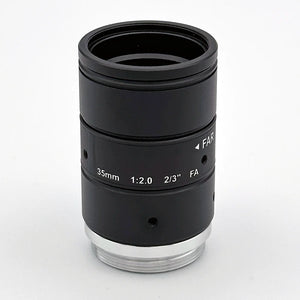
35mm C-Mount 렌즈 2/3" 12MP

$149.00

View details
Lucid Vision Basler C 마운트 렌즈 IMX566

CIL536-F2.8-CMANIR

50mm C-마운트 렌즈 2/3" 12MP

$119.00

View details
12mm C 마운트 렌즈 Hikrobot Basler

CIL552-F2.8-CMANIR

12mm C-Mount 렌즈 1.2" 25MP

$249.00

View details
16mm C-Mount 렌즈 25MP Lucid Vision TRI245S-C

CIL553-F2.8-CMANIR

16mm C-Mount 렌즈 1.2" 25MP

$249.00

View details
25mm C 마운트 렌즈 25메가픽셀

CIL554-F2.6-CMANIR

25mm C-Mount 렌즈 1.2" 25MP

$249.00

View details
35mm C-Mount 렌즈 1.2" 25MP

CIL555-F2.6-CMANIR

35mm C-Mount 렌즈 1.2" 25MP

$249.00

View details
50mm C 마운트 렌즈 25메가픽셀

CIL556-F2.8-CMANIR

50mm C-마운트 렌즈 1.2" 25MP

$249.00

View details
A machined part backlit from below under an inspection camera to silhouette its edges
Backlighting sharpens edges for accurate dimensional gauging.

자주 묻는 질문

How do I choose a lens for machine vision quality inspection?

Start with your smallest defect size and work backward. Calculate the pixels needed to detect it reliably (3 to 5 pixels per defect minimum), which sets your sensor resolution requirement. Working distance is usually fixed by your physical setup, and it determines focal length through the rectilinear focal length equation. Aperture then sets your depth of field. Work through the specifications in this order: defect size, sensor resolution, working distance, focal length, aperture, sensor format.

What machine vision lens should I use for label inspection?

Name the task first: barcode/Data Matrix reading, OCR/lot code reading, label placement verification, or print-defect inspection. Barcode reading needs low distortion and enough pixels per module; OCR needs tighter resolution and contrast uniformity. Most stations choose between a compact M12 lens for flat surfaces and a C-mount lens with an adjustable iris for curved containers with depth-of-field pressure. Telecentric optics are rarely the right answer for label inspection.

What machine vision lens should I use for seal inspection?

Start with the task. Contamination detection inside the seal lane needs contrast and spatial resolution, with lighting geometry usually doing more work than lens choice. Seal-width verification needs low distortion (sub-0.5%) to keep apparent width consistent across the field. Seal-position and continuity checks need field coverage and resolution along the seal length. For most stations, choose a C-mount lens with an adjustable iris when packaging presentation is variable, and a compact M12 lens when the head must stay small and the surface is consistent.

What machine vision lens should I use for liquid level inspection?

Start with the inspection task type. For threshold-based pass/fail fill checks, moderate low distortion around 0.5% TV is typically sufficient and cost per lane matters. The CIL083 8mm M12 at $19 and -0.5% TV distortion handles these checks well on compact and multi-lane systems. For measurement-grade fill estimation where image height maps to physical fill volume, target under 0.2% distortion. The CIL533 16mm C-mount at -0.1% distortion or the CIL553 16mm C-mount at -0.09% distortion are the safer choices when geometric accuracy is a real requirement.

What machine vision lens should I use for print inspection?

Start with the inspection task. Date and lot code reading requires enough pixels per character and low distortion to keep character geometry consistent across the field. OCR and character verification is more demanding because the algorithm must distinguish individual strokes. Print-position and registration checks require low distortion across the full field; a lens with 2% barrel distortion introduces apparent position errors that can exceed registration tolerances. Print-defect detection is primarily a contrast and spatial resolution problem. C-mount with an adjustable iris is the practical default for most fixed-station area-scan applications; M12 works when the head must stay compact on a flat surface.

Do I need a telecentric lens for quality inspection?

Only if you are measuring dimensions where perspective error is unacceptable, such as checking heights or diameters from above. For most surface defect detection, barcode reading, seal checks, and print verification, a standard entocentric C-mount or M12 lens works and costs significantly less. Telecentric lenses require precise working distance control and have a limited field of view. Commonlands does not currently sell telecentric lenses; reserve them for true metrology applications through a specialist vendor.

Can I use an M12 lens for industrial quality inspection?

Yes, for embedded inline inspection where size and cost are the primary constraints and the inspected surface is flat or near-flat. Most M12 lens models cover sensors up to 1/1.8", with select models reaching 1/1.7" to 1/1.6"; the low-distortion CIL052, for example, covers sensors up to 1/1.8". For larger sensors, precision measurement requiring an adjustable aperture, or depth-of-field control on curved or uneven surfaces, C-mount is the better tool: its iris ring makes stopping down for DOF practical when illumination is programmatically controlled.

How does working distance affect inspection lens choice?

Working distance directly determines focal length: EFL = (working distance × sensor width) / field-of-view width. Shorter working distance requires a shorter focal length at a given field of view and sensor size. Longer working distance requires a longer focal length but provides more physical clearance for conveyor hardware, robot arms, or enclosures. Working distance is usually constrained by your physical setup before you ever open a lens catalog.

What aperture should I use for quality inspection?

For flat parts at a fixed working distance, open the aperture for maximum light throughput, MTF permitting; many industrial lenses are aberration-limited wide open and reach peak sharpness one to three stops down. For 3D parts or components with varying heights, stop down to increase depth of field. Diffraction sets a practical ceiling: above F# ≈ 2 × pixel_pitch_µm, diffraction softening typically exceeds the DOF/resolution gain from stopping down further. For a sensor with 3.45 µm pixels, that ceiling is roughly F/7.

Does barcode or Data Matrix reading need a low distortion lens?

Yes, for most inline barcode and 2D code reading. A lens with significant barrel or pincushion distortion compresses or stretches code module geometry near the image periphery. Decoders read bar-to-space ratios and cell dimensions; when those are skewed by distortion, decode confidence drops and partial reads become more likely near the corners. A lens with 0.3% or less distortion keeps symbol geometry close to nominal across the full field.

When does an adjustable iris matter for seal or label inspection?

When the packaging or label surface is not flat. Bottles, pouches, blister packs, and formed containers create height variation of a few millimeters across the inspection zone, which pressures depth of field at wide apertures. An adjustable iris lets you stop down and recover exposure with illumination power, a routine tradeoff since inspection illumination is usually programmable. M12 lenses typically ship with a fixed aperture, which removes that option and is fine for flat surfaces but a real constraint on curved or uneven ones.

Why does backlighting matter more than exotic optics for fill level inspection?

Fill level inspection is primarily a contrast and geometry problem. Diffused backlighting creates a high-contrast silhouette of the container and liquid column that makes the meniscus edge easy to locate reliably for most liquids, including dark and opaque ones. Repeatable container positioning matters equally: if the container shifts laterally between frames, the meniscus's apparent pixel position changes even if the actual fill level has not. Backlighting and consistent positioning solve most fill-level detection problems before optics selection becomes the limiting factor.

When does a print or fill inspection job cross into line-scan or specialty optics territory?

When the inspection requires full coverage of a continuously moving web at production speed (continuous-web print inspection) or 360-degree container inspection in a single pass. These use line-scan cameras with linear-sensor optics or multiple synchronized cameras and pericentric lenses, a different system architecture from fixed-station area-scan inspection. Commonlands does not currently sell line-scan, pericentric, or liquid-lens autofocus optics; these require a specialist vendor.

What lens resolution do I need for surface inspection?

Match your lens to your sensor's pixel pitch. A 12MP-rated lens like the CIL512 resolves 3.45 µm pixels on a 1.1" sensor. For 25MP sensors with 2.74 µm pixels, use a 25MP-rated lens like the CIL553. If your lens resolution does not match your sensor, you are paying for pixels you cannot use: the optical blur exceeds the pixel pitch before the sensor limit matters.

Need help sizing a lens for an inspection application?

Commonlands engineering can work through defect size, resolution, working distance, and sensor format with you before you commit to hardware.