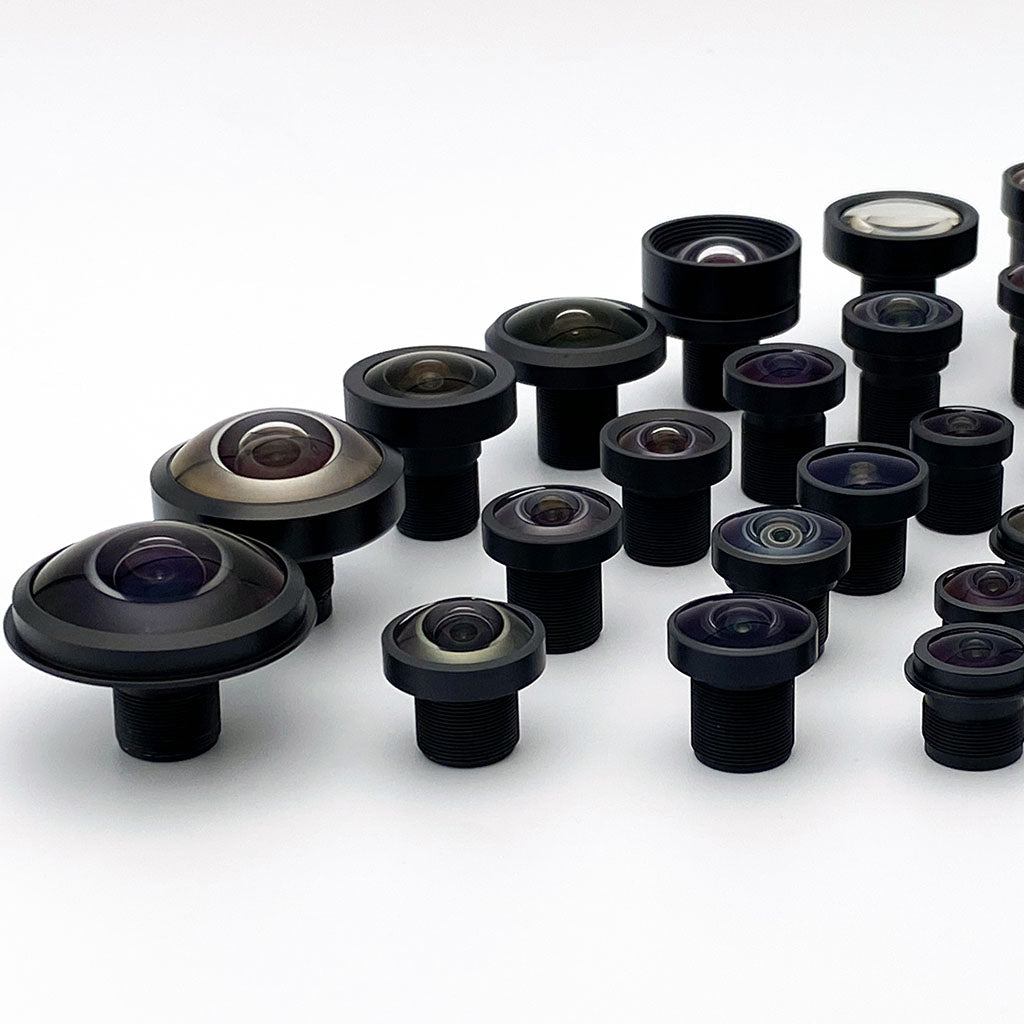

카메라 초점의 물리적 원리는 무엇일까요?
Camera focus happens when light rays from your object converge precisely onto the image sensor.
The distance between lens and sensor where sharp focus occurs is the lens-to-sensor spacing, not the back focal length, a fixed rear-vertex-to-rear-focal-point distance at infinite conjugate (Smith, Modern Optical Engineering, 4th ed.). Adjusting focus changes this spacing to match the working distance.
For M12 lenses, each full rotation moves the lens 0.5mm (the M12×0.5 thread pitch). How far the object plane moves depends on the conjugates. The differential |Δu| ≈ (u/f)² × |Δv| (u working distance, f focal length, Δv axial travel) holds for small rotations only. Over a full turn it badly overshoots.
For a full turn, use the exact thin-lens conjugates: v = uf/(u − f), v′ = v + 0.5mm, u′ = v′f/(v′ − f). A 4mm lens focused at 300mm refocuses near 33mm, a swing of roughly 267mm. An 8mm lens lands near 97mm, roughly 203mm. One full turn is a coarse move. Step 5 below works in 1/16-turn increments.
C-mount lenses work differently: you turn a focus ring instead of threading the whole lens. What the ring drives is design-specific: some designs move internal groups on a cam, while others use unit focusing (the whole cell in a helical), front-cell focusing, or fixed focus.
알아두어야 할 주요 용어
유효 초점 거리(EFL): 화각과 피사계 심도를 결정합니다. 이는 일반적으로 렌즈 사양에 표기되는 항목입니다(예: “4mm 렌즈”).
Mechanical Back Focal Length: Distance from a rear mechanical reference on the lens housing to the sensor. M12 has no standardized flange, so the reference surface varies by vendor. Take it from the specific lens drawing. This determines if a lens physically fits your camera.
플랜지 초점 거리: C-마운트 시스템의 경우, 마운트 플랜지에서 센서까지의 거리가 17.526mm로 표준화되어 있습니다.
Note: Optical back focal length, from the last optical surface to the image plane, is what the designer budgets against the IR-cut filter and cover-glass stack, rear-element clearance, and the exit pupil position that sets chief ray angle. Mechanical back focal length, from the vendor-defined rear housing reference, tells you whether a lens fits and reaches focus.
Browse Commonlands M12 lenses or C-mount lenses, and check your sensor's pixel size and optical format on our image sensors reference. The lens image circle must cover the sensor's full diagonal.
M12 렌즈는 어떻게 초점을 맞추나요?
M12 focusing means systematically threading the lens while monitoring image sharpness. Each rotation moves it 0.5mm. Use a stable target at the intended working distance and compare focus across the field.
Thread tolerance mismatches between M12 lenses and holders often leave the lens sitting at a slight angle, making one side of the image sharp and the other blurry, a problem detailed in our M12 lens technical guide. Align the target with the sensor plane before judging lens performance. A level ceiling fixture can help establish target geometry, but lens-to-sensor tilt requires mechanical alignment of the lens, holder, or sensor. Aiming upward does not correct it.
카메라를 단단히 고정하세요
보드 장착형 카메라를 대상물을 향하게 하거나, 천장 대상물 측정 방식의 경우 위쪽을 향하도록 단단히 고정하십시오. 초점을 맞출 때 아주 미세한 움직임이라도 결과에 영향을 미칩니다.
수준 평가 차트
Place four test charts halfway from center to corner, at 0.5 field height. Unequal sharpness among them flags a problem, but not its cause: sensor tilt, field curvature, astigmatism, and decentered elements can all look alike here. Through-focus checks at center and corners tell them apart.
고르게 비추기
시야 전체에 걸쳐 일관된 조명을 적용하세요. 조명이 고르지 않으면 잘못된 명암 구배를 만들어 초점 문제를 가려버릴 수 있습니다.
적절한 노출 설정하기
초점을 맞추기 전에 그레이 카드를 사용하여 올바른 노출 설정을 확인하십시오. OECF 및 ColorChecker 사용 방법에 대한 자세한 내용은 아래의 노출 설정 가이드를 참조하십시오.
렌즈를 돌려 초점을 맞추기
1/16회전 단위로 회전시키십시오(축 방향 이동량 31.25μm). 중심부뿐만 아니라 모든 테스트 지점에서 선명도가 균일한지 확인하십시오.
잠금 및 확인
UV+열 이중 경화형 접착제를 도포하거나 기계식 잠금 링을 장착한 후, 잠금 과정에서 초점 이동이 발생하지 않았는지 확인하십시오.

전문가 팁
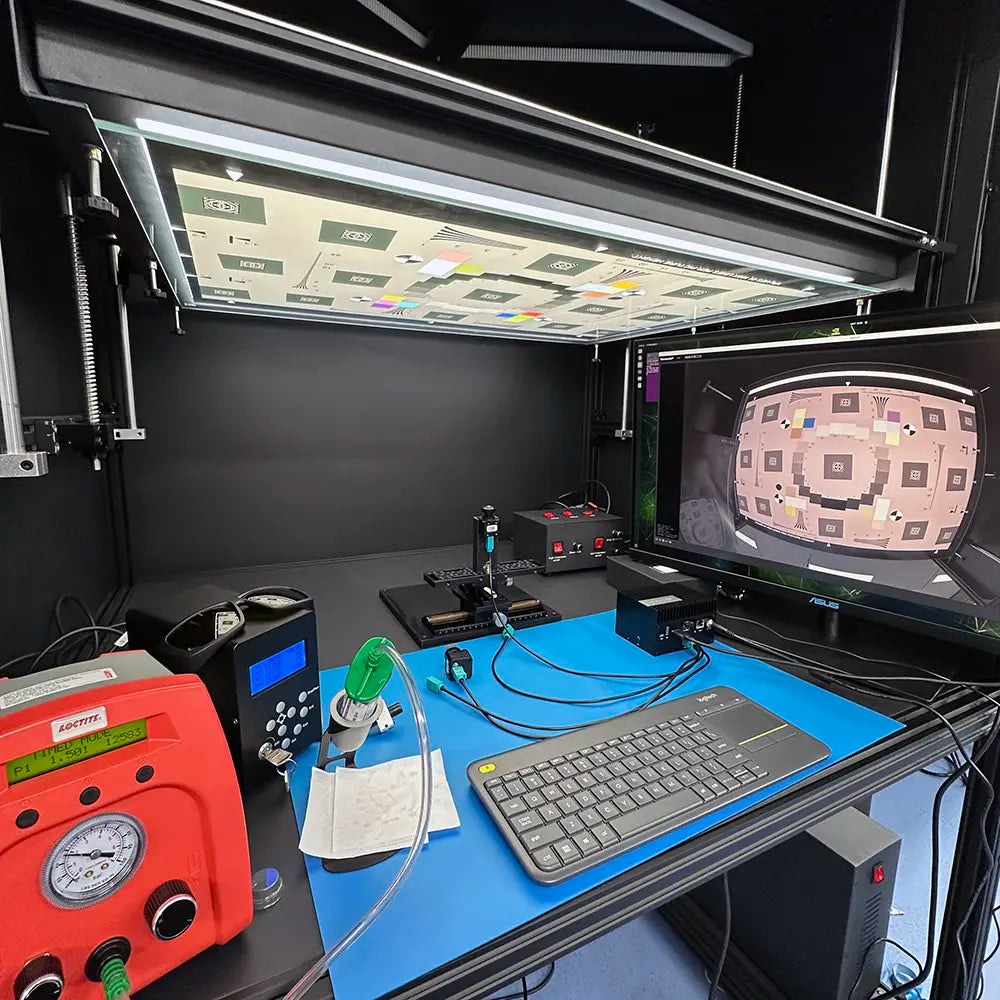
Ceiling target focusing is standard practice at Commonlands' assembly facility, where production lines use precision ceiling fixtures with integrated lighting. Our assembly services cover production volumes from 100 pieces minimum order.
C-마운트 렌즈는 어떻게 초점을 맞추나요?
C-mount lenses have a fixed 17.526mm flange focal distance. You focus by rotating the focus ring, not by threading the whole lens like M12.
C-마운트 초점 조절 방법
- 카메라에 렌즈 장착하기: 플랜지가 닿을 때까지 C-마운트 렌즈를 마운트에 끝까지 조여 넣으십시오. 이렇게 하면 17.526mm의 정확한 간격이 설정됩니다.
- 조리개 설정: 초점을 맞출 때는 가장 밝은 화면을 얻기 위해 조리개를 최대 개방한 다음, 초점이 잡힌 후에는 작업용 f-값으로 조리개를 조이십시오.
- Rotate focus ring: Turn the focus ring (not the entire lens) while viewing live image. Focus-ring travel varies by lens.
- Verify across field: Check center and corners at working aperture. Acceptable center-to-corner MTF variation depends on frequency, field, and wavelength.
- 초점 링 고정: 작동 중 링이 어긋나는 것을 방지하려면 초점 링의 고정 나사를 조이거나 탈착 가능한 나사 고정제를 도포하십시오.
Commonlands C-mount lenses cover 1/2" to 1" sensors with low-distortion designs suited to measurement applications.
간편 참조: M12 대 C-마운트
- M12 나사 피치 1회전당 0.5mm
- C-마운트 플랜지 간격 17.526mm
- M12 초점 조절 방식 렌즈 나사 조임/풀기
- C-마운트 초점 조절 방법 초점 링을 돌립니다
오버슈트 기법을 사용하여 피크 포커스를 어떻게 찾을 수 있나요?
Sweep through the relevant focus range and compare the measured sharpness scores. Passing one peak does not prove it is the best over the full range. After reversing direction, take up mechanical slack and approach the final setting from a consistent direction. Recheck focus after locking.

오버슈트가 효과적인 이유
1. Eliminates backlash: M12 thread backlash varies by lens and holder.
2. 전역 최대값 확인: 이 과정을 거침으로써 국부적 극값에서 멈추지 않았음을 확인할 수 있다.
3. 재현성을 보장합니다: 항상 같은 방향에서 접근하면 일관된 결과를 얻을 수 있습니다.
어떤 초점 고정 방식을 선택해야 할까요?
The choice of focus locking method for board level cameras affects long-term stability, serviceability, and production throughput.
| 방법 | 경화/경화 시간 | 강도 | 양면 사용 가능 | 가장 적합한 대상 |
|---|---|---|---|---|
| 자외선 경화형 접착제 | Seconds to a minute (per datasheet) | 보통 | 아니요 | 실내/통제된 환경 |
| UV+열 이중 경화 | UV pass + thermal bake (per datasheet) | 높음 | 아니요 | 자동차, 아웃도어, 진동이 심한 환경 |
| 잠금 링 | 즉시 | 보통 | 네 | 연구개발(R&D), 현장 수리 가능 장치 |
| PTFE/테플론 테이프 | 즉시 | 낮음 | 네 | 시제품 제작, 임시 설치 |
커먼랜즈 권고안
For production volumes, we recommend UV+heat dual cure adhesive applied as a small fillet around the lens-holder interface. In our assembly work it holds optical alignment through temperature cycling better than UV-only cure. Validate the specific adhesive against your own environmental requirements.
피사계 심도는 어떻게 계산하나요?
Your DOF depends on focal length, working f-number, working distance, and the permissible circle of confusion, the blur diameter you accept at the sensor. That last term follows from pixel pitch, not sensor format, so two cameras of the same format with different pitches have different usable DOF.
저희 카메라 피사계 심도 계산기 를 방문하여 사용 중인 렌즈/센서 조합과 작업 거리 조건에 맞는 최적의 초점 설정을 확인해 보세요.
조립 전에 적절한 노출을 어떻게 설정하나요?
Set exposure before final focus locking so image quality stays consistent across production. Standardized targets, such as ColorChecker gray patches or OECF charts, support repeatable measurements. Use them to measure and reduce unit-to-unit variation within the acceptance limits for the camera. Lens transmission, sensor response, illumination, and processing settings can still differ.

간단한 노출 설정 방법
회색 표적 위치
작업 거리에서 제작용 조명이 비치는 위치에 18% 그레이 카드나 ColorChecker 그레이 패치를 놓으십시오.
표준 조도 설정
생산 환경의 조명 조건을 설정하십시오. 모든 장치에서 재현성을 확보하기 위해 럭스 수치를 기록하십시오.
센서 설정 조정
On an sRGB-like pipeline, 18% gray sits near code value 118 (46% of 255). The right target depends on your ISP.
문서 설정
노출 시간, 게인 및 ISP 관련 매개변수를 기록해 두십시오. 이 값들은 모든 모듈에 적용될 제작 표준이 됩니다.
생산에 필수적인 요소
Always set exposure parameters before applying focus lock adhesive. Exposure time and gain do not move focus, and among the exposure settings only aperture changes depth of field (DOF also depends on focus distance, focal length and magnification, and your circle-of-confusion criterion). Commonlands' assembly service includes standardized exposure calibration with professional gray targets.
흔히 발생하는 집중력 문제와 해결책은 무엇인가요?
These are the failure modes Commonlands sees most often in module assembly, with their root causes and fixes.
| 문제 | 증상 | 근본 원인 | 해결책 |
|---|---|---|---|
| 초점 드리프트 | 선명도는 몇 시간 또는 며칠이 지나면 저하됩니다. | 기계적 풀림, 잠금력 약화 | 자외선(UV) 및 열 이중 경화, 적절한 토크 사양 |
| 모서리 흐림 | 중앙은 선명하고, 가장자리는 부드럽다 | 센서 기울기, 화각 왜곡 | Check target alignment and lens-to-sensor tilt. Evaluate field curvature |
| 재료 불일치 | 환경에 따라 초점이 달라집니다 | CTE 차이, 플라스틱 부품 | Athermal system design: optics, barrel and spacer CTE, adhesive |
| 진동으로 인한 풀림 | 작동 중 초점이 이동함 | 잠금 토크 부족 | 이중 경화형 접착제 + 기계적 고정 |
| 단위 변동 | 카메라마다 초점 설정이 다릅니다. | 부품 공차의 누적 | 적극적인 정렬 공정, 부품에 대한 더욱 엄격한 품질 관리 |
전문 카메라 모듈 조립 서비스
Commonlands assembles camera modules with professional focusing, starting at 100 pieces minimum order quantity. Clean room facilities and precision alignment fixtures keep results consistent for robotics, surveillance, and automotive builds.

최소 100개
대량의 최소 주문 수량(MOQ)이 필요 없는 시범 생산 및 소량 생산에 이상적입니다.
백라이트가 적용된 수직 표적
Leveled, verified targets that minimize left-right focus gradients.
전문 잠금 장치
UV+열 이중 경화 방식이 표준이며, 맞춤형 옵션도 제공됩니다.
품질 보증
100% 광학 검사 및 초점 검증.
신속한 처리
대부분의 주문은 2~3주 이내에 일반 배송됩니다.
볼륨 스케일링
100개에서 10,000개 이상까지 일관된 품질을 보장합니다.
Minimum order quantity: 100 pieces. Learn more about our assembly services or contact our engineers to discuss your requirements.
집중력 문제를 해결할 준비가 되셨나요?
Our team handles lens focusing and locking so you can work on your application.
조립 견적 받기What Is Active Alignment? (OEM Production)
Active alignment optimizes focus while monitoring image quality in real-time, improving yield for high-volume OEM production. Whether it pays off depends on required yield, how tolerance-sensitive the design is, equipment amortization, cycle time, and how far passive fixturing gets you. The capital cost and changeover effort usually point toward large production runs.
The process uses 6-axis positioning with MTF or contrast feedback to optimize each unit individually.
‘능동적 정렬’이 적합한 경우
When It Pays Off: No universal volume threshold. Yield targets, tolerance sensitivity, and equipment amortization set the break-even, usually reached in high-volume OEM production
Yield Improvement: Higher first-pass yield
대표적인 적용 분야: 자동차 ADAS 카메라, 스마트폰 모듈, 고성능 감시 카메라
설비 투자: 정렬 스테이션당 상당한 자본 비용
For lower volumes, manual focusing with proper fixtures and ceiling targets avoids that capital cost. Commonlands does not run active alignment: our camera module assembly service focuses lenses this way from 100 pieces, and automated focusing stations, each running 120 modules per hour, will be online for volume production by the end of 2026.
For the full technical breakdown, including the 6-axis error budget and UV-cure locking, read our active alignment guide for camera modules.
자주 묻는 질문
M12 렌즈의 초점을 맞추는 올바른 절차는 무엇입니까?
Check safe thread travel and rear clearance first. Place a target at the required working distance, then sweep focus while comparing center and corner sharpness. Take up backlash and use a consistent final approach direction. Lock the setting with the specified ring or adhesive, then recheck focus. An M12 × 0.5 thread moves 0.5mm per full rotation.
C-마운트 렌즈는 어떻게 초점을 맞추나요?
C-mount lenses have a fixed 17.526mm flange focal distance. Focus is achieved by adjusting the focus ring on the lens barrel rather than threading. Use the same target and verification procedures as M12. Lock with set screws on the focus ring or friction tape. Browse our C-mount lens collection for options matched to your sensor size.
초점 조절에 천장 표적을 사용하는 이유는 무엇일까요?
A ceiling target provides a stable test distance and a convenient reference for leveling the target and camera fixture. That controls target-to-camera alignment. It does not remove lens-to-sensor tilt from thread or assembly errors. Use through-focus measurements across the field and adjust the lens, holder, or sensor alignment to correct those errors.
UV 경화와 UV+열 이중 경화의 차이점은 무엇인가요?
UV cure adhesive typically sets in under a minute but may leave shadowed areas that don't fully cure. A UV-and-heat dual-cure adhesive can cure shadowed regions during a thermal stage. The required temperature and time depend on the adhesive and must remain within the module's temperature limits. Cure schedule, adhesion, and outgassing are adhesive-specific, so follow the manufacturer's datasheet and qualify the joint on your own assembly. We default to dual cure for automotive and outdoor applications.
‘능동 정렬’이란 무엇인가요?
Active alignment adjusts lens position while monitoring image quality metrics in real-time. This compensates for component tolerances by optimizing each unit individually. It's most common in high-volume production where consistent quality is required despite manufacturing variations. The break-even against passive fixturing depends on yield targets, tolerance sensitivity, and equipment cost. The process typically uses 6-axis positioning with MTF or contrast feedback.
시간이 지남에 따라 초점이 어긋나는 것을 어떻게 방지할 수 있나요?
Focus drift is prevented by: 1) Using proper locking methods (UV+heat dual cure for production), 2) Selecting thermally stable designs (all-glass optics help, but drift depends on the whole system: element powers, barrel and spacer CTE, adhesive), 3) Allowing adequate cure time before handling, 4) Using mechanical retention as backup for high-vibration environments. Our assembly service includes validated locking procedures for long-term stability.
커먼랜즈에서 제 카메라 모듈을 조립하고 초점을 맞춰줄 수 있나요?
Yes. Commonlands provides complete camera module assembly: professional focusing, lens-to-sensor alignment, and permanent locking, using clean room environments and precision fixtures. Services include M12 and C-mount lens integration, custom fixtures, and 100% optical verification. Minimum order quantity is 100 pieces. Contact our engineering team to discuss your requirements.
제 애플리케이션에는 어떤 초점 고정 방식을 사용해야 할까요?
For production: UV+heat dual cure adhesive. For R&D: mechanical lock rings for adjustability. For prototyping: PTFE tape for temporary holding. For automotive/outdoor: we default to dual cure for temperature resistance. For serviceable products: lock rings with thread locker. Each method has trade-offs between permanence, strength, and reversibility.